Supabase Guide
Below is a step-by-step guide for creating a new Supabase project and configuring it for user authentication, database tables, and Row Level Security (RLS) policies.
(Screenshots included at the end for reference.)
1. Create a Supabase Project
- Visit supabase.com.
- Create an account (or log in if you already have one).
- Create a new project in the Supabase dashboard.
- Add your project’s URL, anon public key, and service role key to your
.envfile (or wherever you store environment variables). You will find these in the Supabase project settings under Project Settings → API.
2. Set Up Authentication
- In the Supabase dashboard, go to “Authentication” in the left sidebar.
- Click on “Providers”.
- Toggle Google Sign-In to enable Google as a provider.
- Enter your Google Client ID and Client Secret.
- If you don’t have a Google Developer account, you can set one up at console.cloud.google.com.
- Save your changes.
3. Create the profiles Table
-
In the Supabase dashboard, go to “Database” → “Tables”.
-
Click “New table” (or the equivalent “Add Table” button).
-
Name the table:
profiles -
Make sure “Enable Row Level Security (RLS)” is checked.
-
Add the following columns:
Column Data Type Notes customer_idtext (e.g., Stripe customer ID) price_idtext has_accessboolean websitetext biotext locationtext birthdaydate user_id(foreign key) Click the chain icon to set up a foreign key to Auth → Users (point to id).emailtext timezonetext -
Click “Save”.
4. Configure RLS (Row Level Security) Policies
With RLS enabled, you must create or modify policies that determine who can SELECT, INSERT, UPDATE, or DELETE data in the profiles table. Below are three common policies:
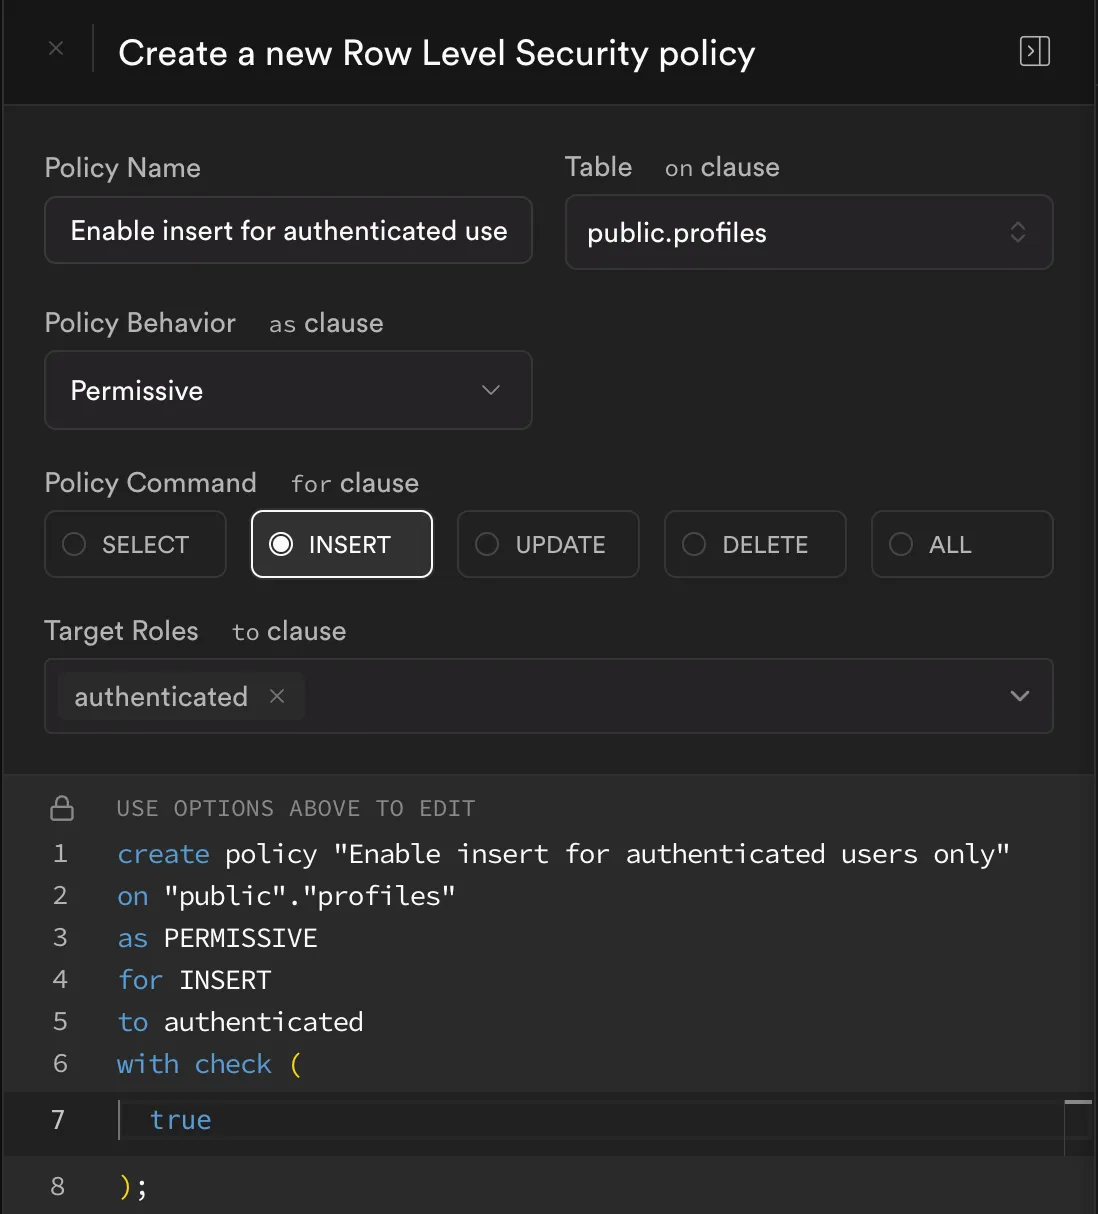
Policy #1: Enable Insert for Authenticated Users Only
-
Go to “Database” → “Tables” → “profiles” → “Policies”.
-
Click “Create Policy” and fill in the details:
- Policy Name:
Enable insert for authenticated users only - Table:
public.profiles - Policy Behavior:
Permissive - Policy Command:
INSERT - Target Roles:
authenticated - With Check:
true
- Policy Name:
-
The resulting SQL is:
create policy "Enable insert for authenticated users only"on "public"."profiles"as PERMISSIVEfor INSERTto authenticatedwith check (true);
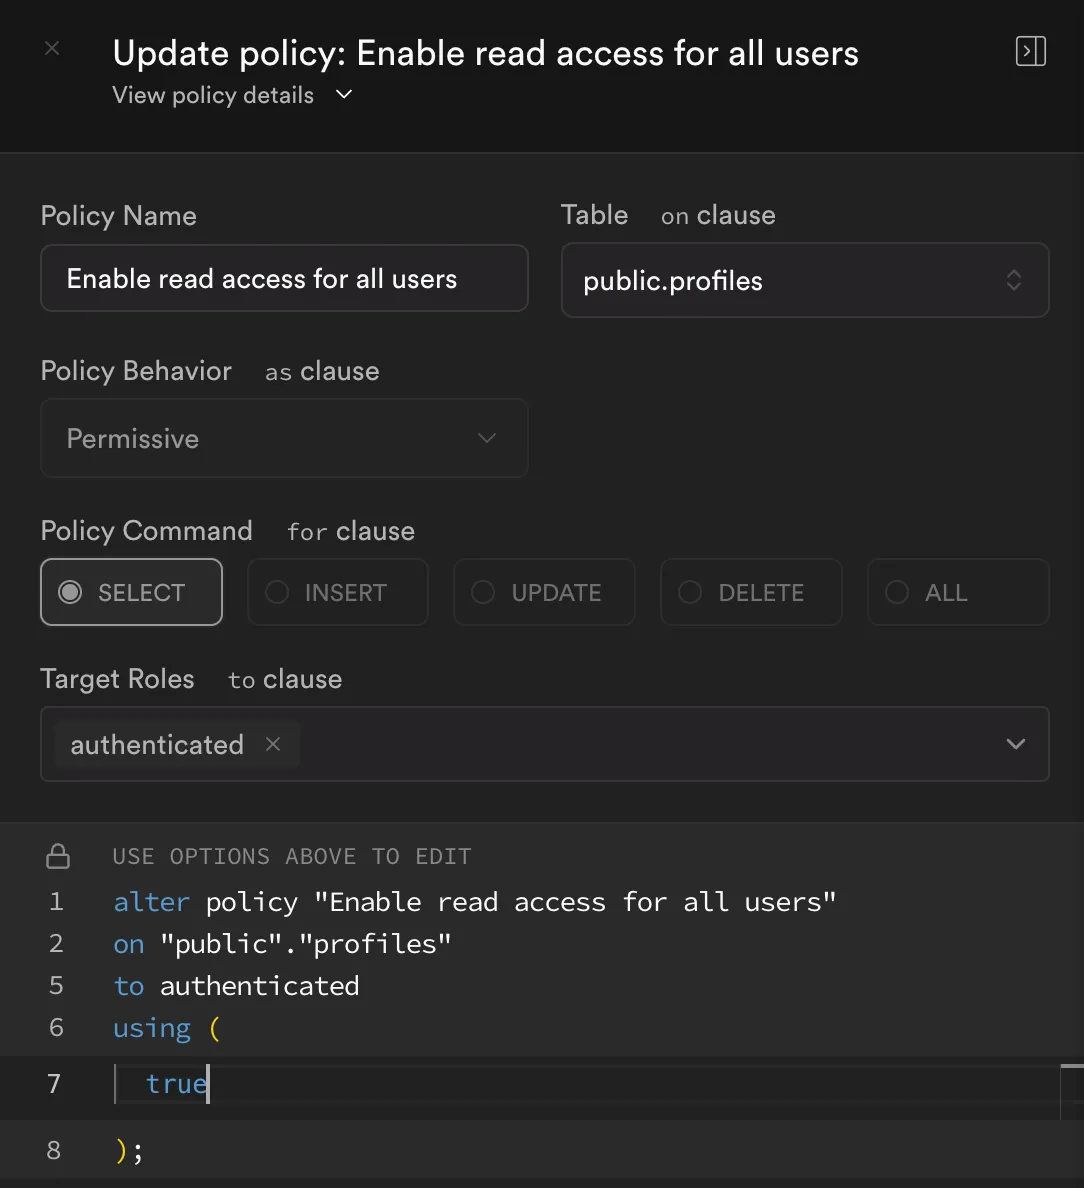
Policy #2: Enable Read Access (SELECT) for Authenticated Users
-
If you need to create or update a policy for reads, do similarly:
- Policy Name:
Enable read access for all users - Table:
public.profiles - Policy Behavior:
Permissive - Policy Command:
SELECT - Target Roles:
authenticated - Using Expression:
true
- Policy Name:
-
The resulting SQL might look like:
alter policy "Enable read access for all users"on "public"."profiles"to authenticatedusing (true);
(In the screenshot, the policy is titled “Enable read access for all users,” but you can modify the name/roles according to your needs.)
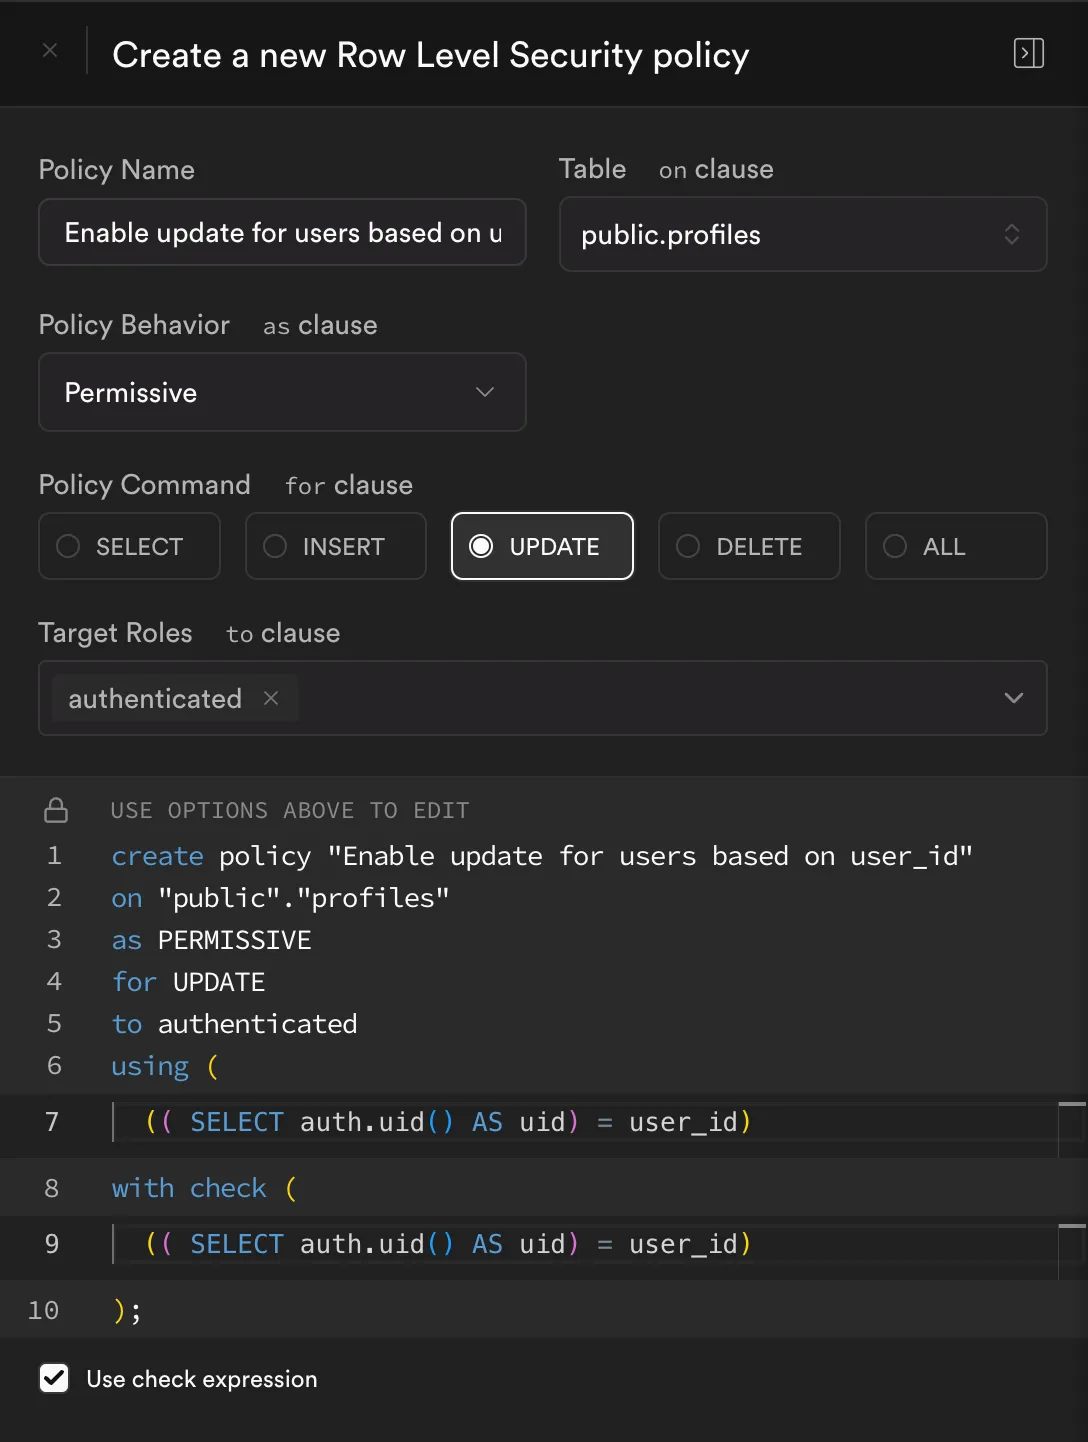
Policy #3: Enable Update for Users Based on user_id
-
Again, in “Policies” for the
profilestable:- Policy Name:
Enable update for users based on user_id - Table:
public.profiles - Policy Behavior:
Permissive - Policy Command:
UPDATE - Target Roles:
authenticated - Using Expression:
(( SELECT auth.uid() AS uid) = user_id) - With Check:
(( SELECT auth.uid() AS uid) = user_id)
- Policy Name:
-
The resulting SQL is:
create policy "Enable update for users based on user_id"on "public"."profiles"as PERMISSIVEfor UPDATEto authenticatedusing ((( SELECT auth.uid() AS uid) = user_id))with check ((( SELECT auth.uid() AS uid) = user_id));
5. Update Environment Variables
Update your .env file with the following environment variables:
NEXT_PUBLIC_SUPABASE_URL=your-supabase-urlNEXT_PUBLIC_SUPABASE_ANON_KEY=your-anon-public-keySUPABASE_SERVICE_ROLE_KEY=your-service-role-key6. Verification & Testing
- Sign in with your Google account (or other providers) to ensure the RLS rules behave as expected.
- Test inserts and updates to confirm only the user with matching
user_idcan modify their own data. - Test reads to confirm that all authenticated users (or whichever roles you chose) can select from the
profilestable.
Screenshots (Reference)
Below are the screenshots referenced above, showing the Supabase UI for policies:
- Insert Policy
- Read Policy
- Update Policy
(Replace the placeholder images with your actual screenshot URLs or local file references.)
Congratulations! You have now set up a Supabase project with user authentication, a profiles table, and RLS policies for inserting, reading, and updating data securely. Always ensure that your RLS policies are configured to fit your specific security requirements. If you have any questions, feel free to consult the Supabase documentation or reach out to the community.